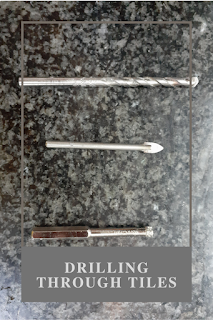
Drilling through tiles
It was going to be a simple job - swap the old wire shower basket for something with a bit more substance. I have drilled into tiles before. It requires a bit of patience, but I can do it without damaging the tiles.

The simple job turned into a two-day operation!
As life always works out, the holes for the two shower baskets did not correspond. The new basket has a bit more intelligence behind it, with 3 holes instead of 2. If you are installing a corner basket, always look for something that fastens with 3 screws. Without the third screw, the basket has a habit of rocking. I believe the thinking is that the corner will stabilise the basket, but you can never get the basket tight enough in the corner to stop this from happening.
Take note; not all tiles are created equal. All my tile drilling experience had come from ceramic tiles. They are the 'cheaper' option, made from fired clay covered in a glaze. Porcelain tiles are made from a clay mix and then fired at a higher temperature than ceramic tiles. This means that they are harder wearing. Personally, I prefer the ceramic tiles, as I have found that the glaze protects the tile better. Spilling something on the tile will not leave a permanent stain, whereas I still have paint stains on my porcelain tiles from a ceiling job.
And porcelain tiles are hard.
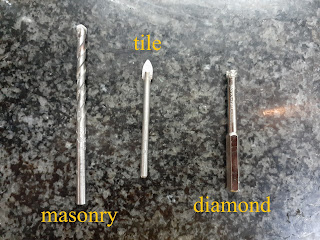
Our bathroom walls are tiled in porcelain (the floor as well). I started off with my trusty carbide masonry bit. After an hour of leaning against a drill, I gave up. I was about halfway through the tile. I decided I was working with a worn bit. It had done service for four bathrooms. It was time for a new one. As I could not find the same bit at the hardware store, I bought a tile bit. This worked well, and I quickly completed the hole. This gave me hope and energy and I started the second hole, just to end up in the same position.
After a day of struggle and shoulder pain, I went through every hardware store in our town until I got hold of a diamond bit. With it loaded in my drill, I could make quick work of the final 2 holes.
Tips when drilling into tile
If you know what tile you are dealing with, remember that the masonry and tile bits are for softer tiles.
Never use hammer action on your drill, you will crack the tile.
Have a masonry bit handy. Once you are through the tile, you still need to drill into the wall. Whichever bit you use for tile, will not stay sharp for long if you use it as a standard masonry bit.
With diamond bits (coring type), you need to start at a 45-degree angle and then move to 90º. If you have the patience, you can start with a masonry or tile bit to get a guide hole. Once this is in place, you can use the diamond bit at 90º without it slipping.
Have a squirt bottle with water handy. Cooling the tile and the bit will help with the bit life and stop the tile from cracking due to heat.
Make sure that the tile you are drilling into is not hollow. The pressure of you drilling into the tile is bound to crack it. If the spot you want to drill into is hollow, try drilling without applying too much pressure - just know your risk, it could still crack.


Comments
Post a Comment